Orions Fashion
A tearing football boot upper can turn a comfortable fit into a painful distraction, especially when the split opens across the toe or beside the laces. The best repair depends on the upper’s material, tear size, and location. A small surface split in synthetic leather may respond well to a flexible, material-compatible adhesive and a reinforcing patch. A tear through mesh, stitching, or a high-stress seam needs more careful assessment.
This guide explains how to fix a tearing football boot upper with practical steps: identify the material, clean and fully dry the area, align the edges, and apply repair products according to their instructions. Keep adhesive away from the boot’s inner lining and allow the full curing time before wearing it. Small details matter. Dust or dampness can weaken a bond, while a patch placed under tension may peel during a sprint. A tidy repair is not always a durable one.
Some damage needs a cobbler’s attention. If the tear keeps spreading, exposes the lining, or affects a stitched seam, home repairs may only delay failure. Don’t force it. After a repair, test the boot with gentle movement before returning to training, then check for lifting edges or pressure points. This approach cannot restore every boot to new condition, and that limitation is easy to underestimate. The following sections compare repair options, explain common mistakes, and help you decide when replacement is the more dependable choice.
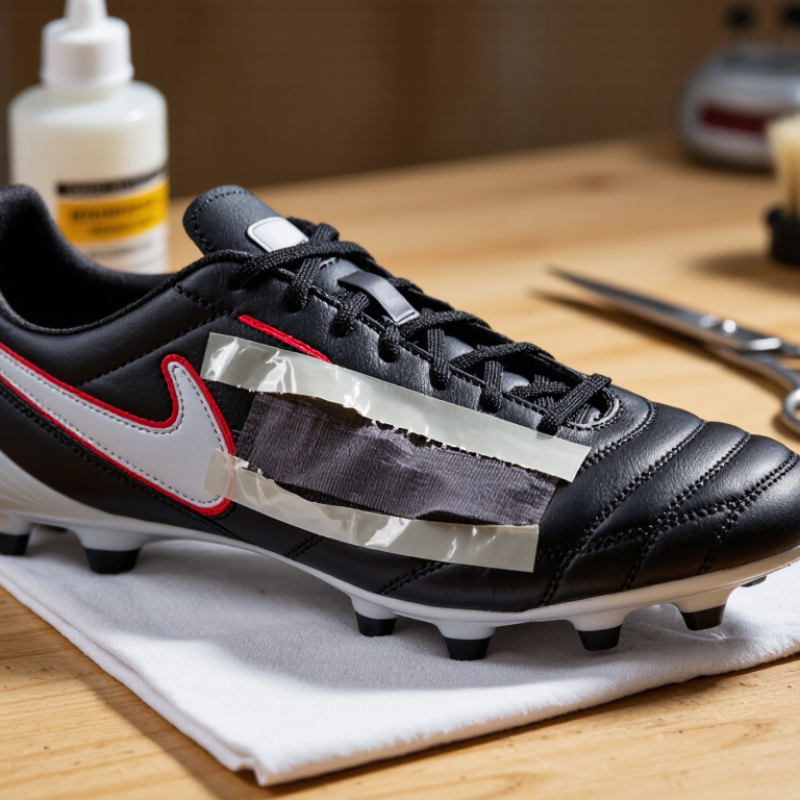
Assess the tear before reaching for adhesive. Remove loose dirt with a soft, dry brush, then let the boot dry fully. Flex the upper gently under good light. Look closely. A short split in an otherwise supple panel may be repairable, especially when the lining beneath it remains intact.
Check the tear’s location and edges. Damage away from stitching and lace holes is often simpler to assess than a split that crosses a seam, eyelet, or the upper’s attachment to the sole. Look inside the boot for torn lining, exposed padding, or a hole that opens wider when the upper bends. A common misread is to treat a tiny split as harmless; repeated flexing can make it spread.
Material matters, too. Woven or knitted uppers may fray, while coated synthetic panels can crack around a tear. If the material is brittle, the damage is long, or the sole is separating, a repair may not hold reliably. I would not judge repairability by appearance alone; that can be wrong. Stop using the boot if the tear affects fit or support, and ask a footwear repair professional to inspect uncertain damage. A small, stable tear with sound surrounding material is a more reasonable repair candidate.
Before repairing a tearing football boot upper, remove the laces and brush away dry grit with a soft, clean brush. Dirt trapped at the tear can act like sandpaper during handling. Wipe the area with a barely damp cloth and mild soap, then remove soap residue with a second cloth. Keep water out of the lining and avoid soaking leather or bonded seams. Let the boot air-dry at room temperature. No direct heat. Check the tear under bright light, and gently separate its edges only enough to see whether the damage reaches the lining or stitching. Do not pull loose threads; that can enlarge the opening.
For textile or mesh panels, ISO 13934-1:2013 describes tensile testing that records breaking force and elongation, while ISO 12947-2:2016 covers abrasion testing to specimen breakdown. These standardized measurements show why the surrounding material matters: a clean tear in sound fabric is different from one beside worn, weakened fibers. They do not provide a universal home-repair threshold, so inspect for thinning, fraying, and delamination rather than guessing from the tear’s length alone. I might be tempted to scrub harder when a mark remains, but that can roughen the surface. Clean gently, let the upper dry fully, and photograph the prepared area before choosing a repair method.
Match the repair to the upper, not just the size of the tear. Leather usually needs a flexible adhesive labeled for leather, plus a thin leather patch. Synthetic uppers may have polyurethane coatings, so check that the adhesive is compatible with both the fabric and its finish. Knit or mesh needs a flexible fabric adhesive and a lightweight patch that will not seal too much of the material. A stiff glue can crack when the boot bends. That matters.
Clean off dirt and let the area dry fully before applying anything. Trim loose fibers, but avoid cutting sound material. If the adhesive instructions recommend light abrasion, test a hidden spot first; some finishes mark easily. Place a small patch inside the boot when possible, align the edges, and press it flat without squeezing glue through the upper. Keep the boot in its natural shape while the adhesive cures for the full stated time. It is tempting to rush back onto the pitch, but a repair that feels firm indoors may still peel during sharp turns. Flex the boot gently and inspect the edges before wearing it. Large tears or damage near seams may need a professional repair.
| Upper Material | How to Identify It | Suitable Adhesive | Patch Recommendation | Repair Approach | Important Limit |
|---|---|---|---|---|---|
| Natural leather | Often has a natural grain and a soft, slightly irregular surface; the material may feel supple. | Flexible leather or footwear repair adhesive that is explicitly suitable for leather. | Thin, flexible leather or fabric patch placed on the inside of the upper. | Clean and fully dry the area. If the adhesive instructions allow it, lightly roughen only the hidden bonding area. Apply a thin, even layer and press the patch flat while it cures. | A thick or stiff patch can change the fit and create rubbing. Do not use household superglue; it can form a rigid bond. |
| Synthetic PU or coated upper | Usually has a smooth, uniform coating over a fabric backing; it may resemble leather but have a more consistent texture. | Flexible polyurethane footwear adhesive or another flexible adhesive labeled as compatible with polyurethane and synthetic shoe materials. | Thin polyester or nylon fabric patch with a flexible surface; check compatibility with the adhesive. | Test the adhesive on a hidden spot first. Clean without soaking the material, then bond a patch behind the tear and hold it in place as directed by the adhesive manufacturer. | Some coatings are difficult to bond. Avoid strong solvents and excessive sanding, which can damage the coating. |
| Knit or woven textile | Visible threads or loops form the upper; the material stretches or flexes with the foot. | Flexible fabric or footwear repair adhesive that remains flexible after curing. | Lightweight knit or woven fabric patch with enough overlap to support the tear without restricting movement. | Align the torn edges without stretching them. Apply adhesive sparingly to a backing patch, place it inside the boot, and keep the area flat during curing. | Too much adhesive can seep through the weave and make a hard spot. A small patch may not hold if the surrounding fabric is frayed. |
| Mesh or perforated upper | Has open holes or a net-like structure, sometimes combined with a thin outer film or reinforcing layer. | Flexible fabric or footwear adhesive compatible with both the mesh and any coating. | Fine, lightweight mesh or thin fabric backing; use a patch that bridges the tear without blocking a large area of ventilation. | Place the patch inside the upper and apply adhesive to the patch rather than flooding the mesh. Keep the boot supported in its natural shape while it cures. | Adhesive can clog the openings or bond the upper to the lining. Check that the patch does not rub against the foot. |
| Mixed-material or reinforced upper | Combines materials such as synthetic film, textile, mesh, or overlays; the tear may cross more than one material. | A flexible footwear adhesive whose label lists compatibility with every material being bonded. | A thin patch compatible with the weakest or most flexible layer involved. | Identify all layers before starting. Test the adhesive on a hidden area and use a small backing patch that spans the tear without pulling the materials out of shape. | If the tear reaches a seam, lace eyelet, or heavily stressed reinforcement, a home adhesive repair may not be durable. |
General guidance: Follow the adhesive manufacturer’s cleaning, application, clamping, and curing instructions; curing times vary by product. Let the repair cure fully before wearing the boots. For a large tear, a tear at a seam, or damage that affects the boot’s fit or support, seek professional footwear repair or replace the boot.
A torn football boot upper needs a flexible repair that holds without stiffening the foot. Clean and fully dry the area first; brush away grit, then bring the torn edges together without stretching the material. Apply a thin layer of adhesive made for the upper’s material, using a toothpick for a narrow split. Keep glue away from the lining and studs. Press the edges flat and secure them with low-tack tape or a padded clip. Follow the product’s stated curing time before wearing the boot. A neat surface can still hide a weak bond, so check the inside too.
The European Commission’s 2014 Eurobarometer on consumer attitudes reported that 77% of respondents preferred repairing goods to replacing them when repair was affordable. That broad finding is not specific to football boots, but it supports careful maintenance. For a split beside a high-flex point, a surface adhesive alone may not last; consider a footwear repair specialist, especially if the lining is also torn. I once underestimated how much a small toe split opens during a kick. It looked fixed, then lifted again.
Tips: Less is safer. Don’t flood the seam with glue. Test a hidden spot first, and let the repair cure fully. If the edges no longer meet cleanly, avoid forcing them together.
Once the torn upper is bonded, give the repair the full curing time stated on the adhesive instructions. A surface that feels dry may still be weak underneath. Keep the boot in a cool, ventilated place, away from dust and direct heat. Avoid stuffing it tightly; pressure can shift the joined edges. Patience matters. Rushing this part can undo careful work.
Before playing, inspect the seam under bright light. Look for lifted edges, trapped grit, or a glossy gap. Press around the repair gently, then flex the boot by hand without pulling hard. Try it on indoors and take a few slow steps on a clean, dry floor. If the tear opens, feels stiff, or rubs your foot, stop and reassess. It is tempting to test it with a full sprint, but that can turn a small weakness into a larger split. A repaired upper may suit light use, yet deep tears near stitching or the sole need an experienced repairer’s opinion. Even a tidy patch is not always a lasting fix.
Allow the repair to cure fully, then test the boot gradually before returning to play.
These are suggested test durations, not universal cure times. Follow the adhesive label for curing instructions. Start with a visual check and gentle flex; progress to walking and light jogging only if the repair stays closed. Stop if the tear reopens, and do not play until the repair has cured and passed the checks.
Remove the laces and brush away dry grit with a soft brush. Wipe with a barely damp cloth and mild soap, then remove residue. Let it air-dry at room temperature. No direct heat.
Inspect it under bright light. Look for frayed fibers, thinning material, or damage to the lining and stitching. Don’t pull loose threads; the opening could grow.
Choose a flexible adhesive intended for the upper’s material. Apply a thin layer with a toothpick for a narrow split. Keep glue away from the lining and studs.
Bring the edges together without stretching them. Press them flat and secure them with low-tack tape or a padded clip. Less glue is safer.
Follow the adhesive’s stated curing time. Keep the boot in a cool, ventilated place, away from dust and direct heat. A dry surface can still have a weak bond.
Check for lifted edges or gaps under bright light. Press gently, then flex the boot by hand. Try a few slow steps indoors on a clean, dry floor.
A surface repair may not hold well in a high-flex area. If the lining or stitching is torn, ask a footwear repair specialist to assess it.
Only after the repair has fully cured and passes a gentle indoor test. Avoid a full sprint at first. I have mistaken a dry surface for a strong bond; they are not the same.
Knowing how to fix a tearing football boot upper starts with assessing the damage. Check how large and deep the tear is, whether the surrounding material is still strong, and whether the boot can be repaired safely. If the sole is separating or the upper is badly weakened, replacement may be more reliable. For a repairable tear, remove dirt and moisture, then let the area dry completely so the adhesive can bond properly.
Choose an adhesive and flexible patch that suit the upper’s material. Carefully align the torn edges, apply the adhesive as directed, and add a patch where extra support is needed. Press the area together evenly and keep it secured without stretching or distorting the boot. Allow the repair to cure fully before wearing it. Then test the boot gently, checking that the tear stays closed and the repaired area remains comfortable and secure.
